Showing posts with label baby. Show all posts

June 30, 2012

Ruffled Crib Skirt {BOYS}


I Finally finished sewing the crib bedding, and I'm in love!! I must say it was way more adorable before I put the crib rail on...now the rail kind of hides the cute ruffles, but I'm still in love!

Who says boys can't have ruffles on their bed?
 Still need to make one more rail cover for the front of the crib...but I'm pretty sure this little guy won't be born with teeth, so I have a while to get that one done!
 If you missed the rail cover tutorial it's here, or if your just wondering what in the world the rail covers are for...see pictures here as well.

...Oh yeah, and I should probably figure out a name for this little guy so I can add that to the wall too, then I think we will be ready for him!
  I used the crib skirt tutorial from Positively Splendid. Just a tip, the instructions are for a four sided crib skirt, so if you want to spend a little less money/time you probably could make it three sided(since the back usually doesn't get seen). And make sure you read through all the instructions before you get started...your working with LOTS of fabrics and the instructions can get a little confusing if you don't figure out exactly what your working with from the beginning.

Here is the finished product before I put it on the crib.

It was quite the project for a crib that actually won't be slept in for several months, since the baby will be in the craddle, but if I didn't finish it before the baby got her I probably wouldn't have done it at all. SO HAPPY IT'S DONE! This room is coming together and I'm loving it, can't wait to share pictures soon!

June 26, 2012

Crib Rail Covers

What's a girl to do when her first child chews away the railings on his beautiful crib?

Well not leave it like that for the next kid, that's for sure!
(Sorry for the extra blurry picture...not sure how that happened)

I have seen lots of rail covers sold that probably work great, but there just extra tacky. So I decided to come up with a cuter version of a railing cover, that does it's job while looking extra adorable!


I figured out what size I wanted my rail covers to be and quilted a piece big enough that I could cut it in half and have two rectangle strips for each side of the crib.

I finished off the edges by folded them under and sewing 1/4" all the way around the rectangle strip. I didn't really care what the underneath side looked like because know one will see it, but if you care you may want to give it a more finished look.

I made 4 fat ties and 4 skinny ties to sew to each rectangle that will help to secure the rail cover to the crib. The fat ties I cut 4"X 20" and the skinny ties 2"X 20", so after I sewed them into strips the finished sizes of the ties were about 1" and 2" wide.(I wanted mine to be secured with big bows, so I made my strips longer, but if you just want them tied on or secured with velcro you may want to shorten the length of your ties). 
 Sew your ties onto the underneath side of your  quilted rectangle, make sure you lay your rectangle on your crib rail to figure out exactly where you want your ties to be. 

All done, now be happy that you won't have chewed up railings on your beautiful crib.


May 7, 2012

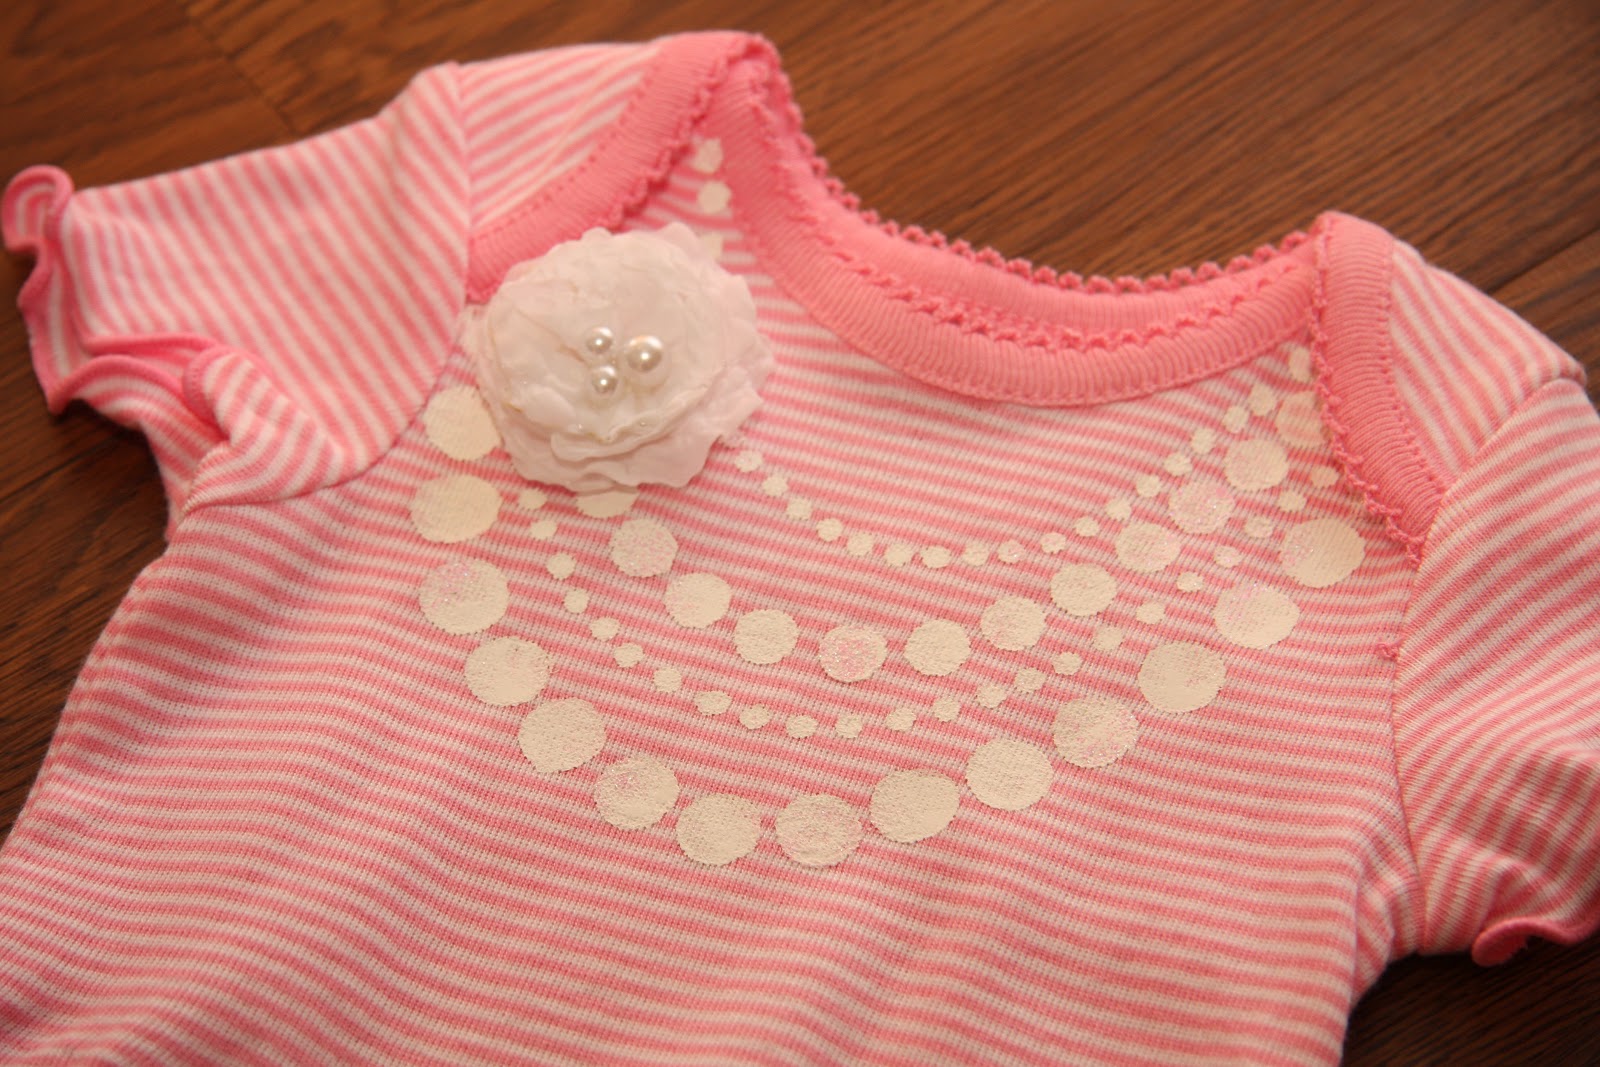
Painted Necklace Onesie


I was to excited throughout this project to stop and take pictures, so I'll just explain how it all went down!

Using regular acrylic paint, and the ends of three different sized paint brushes, I dipped the brush end into the paint and stamped it onto the shirt (make sure you put a piece of cardboard inside the shirt so the paint doesn't bleed through the back). Pretty simple huh? After it dried I did one more coat for good measure!
 (Sorry no tutorial for the ruffly bum this time)
 The flower is also detachable so you can take it off when you wash the shirt.

After your paint has dried completely, lay a brown paper bag or parchment paper over the pained area and iron it. It kind of heat sets it....(melts the paint a little & helps it stay on the shirt better).

Now go make about a million of these adorable little shirts, even if you don't have a little girl...like me! You will have very happy little niece's!

February 23, 2012

Scratch Card Gender Reveal - Tutorial


Materials: 
* Silver Paint (Mine was cheap stuff from Michaels)
* Liquid Dish Soap
* Laminate Paper

 
 To start I cut my circles out on my Cricut, but if you don't want to spend the time cutting circles you could place a rectangle of the laminate paper over the portion of the card that you want scratch paint on.
* If you are using my card template, the circles are 1 1/2".

  
I found the mixing ratio over at ArtMind. They mixed 2 parts paint to 1 part dish liquid. When I did it, it ended up being more like 3 parts paint one part dish liquid. So just test it out...It's probably depends on how thick your paint is to start with. 


After I had a good consistency with my paint, I painted my laminate circles. Don't worry the first coat looks thin (like it's not going to work). Let the first coat dry completely and then paint a second coat, it should cover great (If your still a little worried it's not dark enough, keep adding coats).
* I ended up adding a few drops of dark blue paint to my mixture to darken it (so you won't have to paint as many coats).

When the paint has dried completely, peel off the backing of the laminate paper and cover your circles.

Now your ready to scratch away!


* * * * *
Here's the template, save to your computer and add your own text.


Text for a BOY!                                                       Add your own text!

February 19, 2012

Scratch Card Gender Reveal

Lately I have been excitedly making scratch cards to share the news about our sweet little babe.
Stay tuned for the tutorial.

The cards are in the mail, so as soon as the beans have been spilt to our family and friends I'll be back to reveal the whole card!


Exciting news and all!
Blogging tips